Thursday, March 27, 2008

Why build custom?

This has been a pretty great week. Ok, so at 7 this morning I ate it hard on some ice (and spend most of the day eating vitamin I and sleeping), but other then that, pretty darn sweet.

For most of us custom built bikes are a decadent luxury. Sure, I am pretty darn flexible and have really long monkey arms and short femurs, but deep down I know I'd be ok fit wise with a 53 to 55 cm road bike from any of the major companies. While I have built bikes with a much more precise fit (in some cases event specific fit), it's really not necessary so much as fun, challenging and technically interesting. And thats the case for 98% of the bicycle riding public. Does it mean they don't want, deserve or purchase custom? Hell no- custom is fun, and a chance to get what you want how you want it.

But every now and again, you find a customer that really, truly, needs a custom fit.

This week I have had the pleasure (at my day job) of building bikes for a 4ft tall 100 pound rider, and a 6'2" 350lb rider.

I don't know of a quality stock bike on the market that would really fit and preform well for either of these customers, and I am proud to help make options available to folks well outside the boundaries of a saddle and stem swap. Outside of cool lugs and fancy paint, this is what custom means to me.

Oh, and I finished the torch (and most of the clean up) work on the step through.

Tuesday, March 25, 2008

Fittings and such

Hi folks! I took the weekend off, but am back to work on the step through. This bike will be getting a few one off fittings (accessories) that I will try to photo document and post pictures of. I realized that a few of the special features planned for this one would loose the surprise for the rider if I posted them here first, so I'll be saving a few for later release.

In the meantime, I have started a flickr collection called "Fittings" to show some of my accouterments such as stems, racks, chain guards, etc. I did a quick 6 step progress series for a Cinelli style quill stem slated for this bike. I've made a few of these, but this was the first where the quill pierced the extension. Made the job a fair bit easier, and it looks really good. I think I'll stick with it for now.

Tuesday, March 18, 2008

Too much coffee...

While following random links in Flickr, I ran across an interesting picture taken during an Independent Fabrications factory tour. On the Bicycle Escape shop Blog they talk about a trash can at IF filled with Dunkin Donuts cups and mention "IF runs on Dunkins" (a twist on the company slogan "America runs on Dunkin". Wow, that started the nostalgia/ serendipity bandwagon!

Just that day my parents contacted me and mentioned they wanted bikes. I haven't seen them ride for about 20 years, so I was rather excited by all of this! Now, the one unspoken constant in the Estlund household is the constant flow of coffee, and generally at my folks place that is DD's. As a youngster I used to drink ungodly amounts of the stuff (a gallon a day would be conservative). And while my tastes have developed (more espresso based) and quantity diminished (I limit myself to about 8-12 shots a day), the link is still strong. The orange and pink bubble letters still bring back a flood of visceral memories (ice fishing, cold morning walks, late night runs in HS, my dad's uncanny Dunkin Radar that could track down the tasty brew in any northern state).

Not but a few hours after speaking with my parents my wife shows up with a bag of Dunkin Donuts coffee beans (from Target no less). She saw them on the shelf and they reminded her of my folks.

Dunkin Donuts was founded in 1950 in Quincy, MA (just south of Boston). IF is located in Somerville (just north of Boston), which is the same town my grandparents are from. Hell, if its good enough for them, its good enough for me. Now then, lets see what this does pushed through an espresso machine!


Ya ma! Thinkn' of you!

To continue the semi random chain of incidents, I figured out how to effectively use a tri-scraper to finish fillets. This is based on a suggestion from Ted Wojcik, long time NH frame builder. Thanks Ted!

Thursday, March 13, 2008

The wait is over!

The last time I posted I mentioned searching for drop outs. Low and behold my boss at BF had this set he has been storing for about 20 years in a drawer that he was willing to donate. They are a bit rough in the casting, but the vintage makes them a great match for the frame, and I'm sure they will clean up great!

I have added a bunch of pictures to the flickr set for this build. I forgot my camera when I was mitering tubes, so we skip right from the raw tubing image to the bike in the jig for tacking.

After finishing the very compact sprint bike and very small 650b, this mixte frame adds a whole new level of "tight"! Those tubes are about 4" apart running parallel from the head tube to the seat tube. I'll add another micro TT from the actual top tube to the second bilaminate section to give the seat tube a little more support.

I have the front end fillets finished, but the light was no good for photos. I'll add the chain stays, braze in the head tube proper and sweat the laminate pieces and post some more pictures.

Wednesday, March 5, 2008

What to do while waiting...

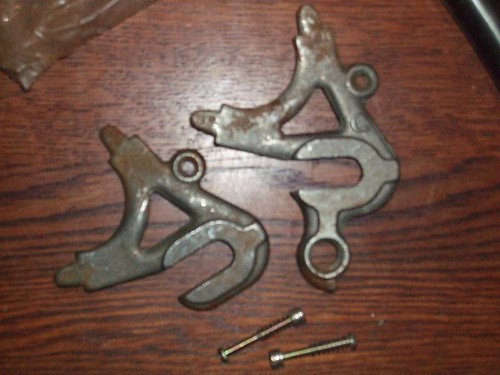
In the last update I mentioned the load of tubes that arrived in the mail. Unfortunately my main three suppliers are out of the drop outs I need and my back up is in Taipei.

Not to be dismayed I continue to keep myself busy and move along with what I can do at the moment. In addition to lacing up some wheels, I busied myself with prep work for the next build.

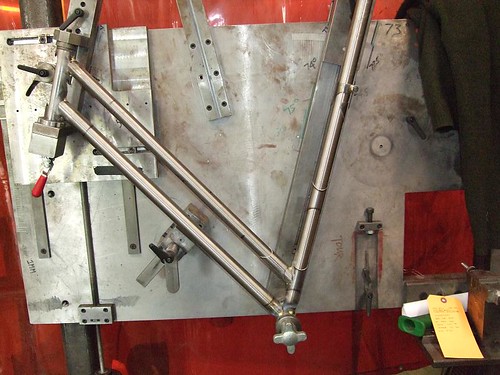
I do most of my design work in my noggin, then finish up and pull miter angles and lengths off of a full sized drawing. This also gives me a visual to double check things like pedal to fender clearance, etc. Here is a pick of the current build's drawing.


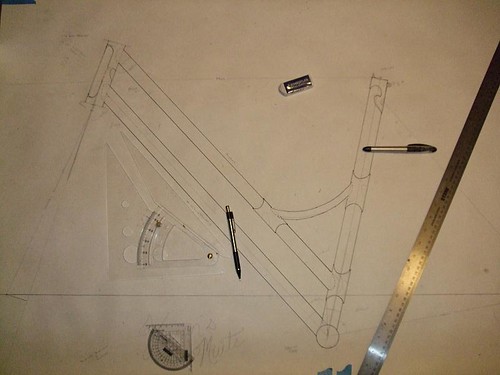
This is for a 700c rambler. The terms city bike and hybrid have started to pigeon hole a bit (hybrid maybe more then a little bit). I'm calling my mulit-use bikes "ramblers", custom designed for your application (not just a mix of road and mountain like aspects). In this case I am matching the handling geometry of a race frame with the position and fit of a 74' Schwinn Suburban. This will be for a rider re-couping from a wrist injury that just couldn't get into pushing around 40+ lbs of American pig-iron, but loved her mixte fit.

This frame will use a Dedacciai Uno tube set and be a fillet/ bi-laminate constructed bicycle. Essentially, bi-laminate means that steel sleeves will be brazed on the outside of the thin walled tubes to act as an external butte to support the loads of intersecting tubes. Sort of like open faced lugs. In the drawing, these can be seen at the head tube, top tube, and 3 on the seat tube. Any place a butted end will be brazed to a thin section, there will be a laminated sleeve to help distribute the load.

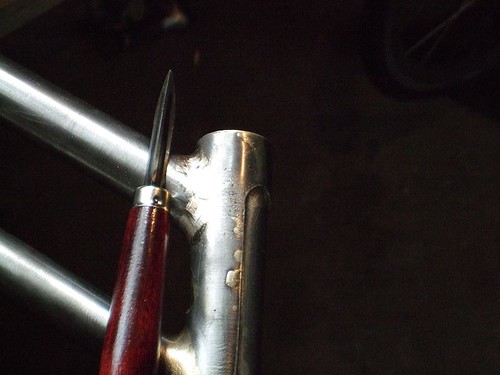
Most bicycle tubing is measured in mm. The seat tube in this case is 28.6mm in diameter, but only .6mm thick in the thin part of the wall. 28.6mm is about 1 1/8". 1 1/4" 4130 with a wall thickness of .058" slip fits over a 28.6mm tube with just enough room to sweat in some silver. But who wants to put a hog .058" (1.47mm) sleeve onto a .6mm tube?

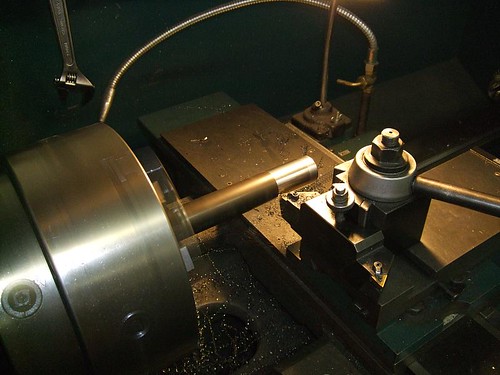
To balance out the wall thicknesses I turned down the 4130 stock on the lathe to about .7mm. Sticking this on will more then double the tubes wall thickness with a negligible weight penalty, will help mitigate heat distortion from brazing, and will look totally bad ass with some subtlety carved embellishment.

I'll try to do a better job of taking in-progress pics and blogging about this build. Stay tuned for the next installment!