Saturday, July 5, 2008

Big News- Winter Bicycles!

Please excuse the brief blog update lull. Its been a very busy last couple of weeks.In addition to work on the cruiser I have also been updating some of my tooling in preparation of a big leap.

After quite a bit of thinking, planning and work, I am quite happy to announce that I am closing the proverbial door on Quixotic Bicycles and opening a new, shiny and bigger door to Winter Bicycles! We are just getting rolling on the web site and will continue to keep adding updates to the Flickr gallery and the new blog.

With the new name I am also pleased to announce that Winter frames and parts will be available to the public. I hope to make complete build packages available in the coming weeks. Please contact me at info@winterbicycles.com to get started on your new project!

Thanks for the continued support, and I look forward to seeing you all at the new blog!

Eric Estlund- Winter Bicycles

Wednesday, June 18, 2008

experiMENTAL Whip 2

Well, here it is!


Fully undersized tubing (7/8" top tube, 1" seat and down tube, 3/8" seat stays and cut down chain stays).
Integrated seat mast.
All fillets brazed with nickel silver.
Tri-tube stem.
380mm stays, 75*seat, 74* head, 33mm rake
Electric Mayhem Pink (named after the most influential band of the 20th century)

Laser sharp geometry and flexy tubing seems to be a really fun combo so far.


Now I just need to dig out my old studded belt...

Tuesday, June 17, 2008

The last weeks happenings.

Interesting last week and a half.

Out of nowhere this showed up at the dumpster.
I counted at least 3 donor bikes, possibly 4. It is clearly an attempt at a rear steer tandem, but the steering linkage gets tangled in the frame and only allows it to turn right. So clearly not a track bike... A co-worker tried to stuff it in the car she saw drop it off, but it was to heavy to drag across the parking lot.

I have wanted to build with the Campy track ends for a long time now (6 years?), so I ordered up a couple sets. Wowzers- these looked better in my imagination. I've been spoiled with KP and Paragon ends I guess. Lots of carving on a belt grinder later I finally got to a workable place.

Just to illustrate how continuously cool the custom bike world is, this week is only two days old and I've had the pleasure to work on a bike for someone 5'0", a rider that is 6'8", and a tandem team that is a powerful 520lbs combined. I LOVE it!

The spring has been fantastic, but its good to get out of the valley from time to time. My wife and I packed up the pooch and headed for the coast over the weekend. Sometimes, it is good to feel humble.


I pretty well wrapped up the experiMENTAL Whip, and will have complete images and a ride report just after I get a headset in it. I've also mitered the His tubes in the His and Hers set, stay tuned for more build details. In the meantime, I'm off for another nap!


Tuesday, June 10, 2008

experiMENTAL Whip 1

I've had a few ideas I've been meaning to try, and the delay in the cruiser tubes was the perfect opportunity to work on a play bike. Something to experiment on. Or, as the case may be, go totally experiMENTAL!

Driving premise- what does it feel like to be a Clydesdale (a race class where you must be over 6' or 200lbs)riding a standard tubed bike?

"Standard" is the typical steel road bike dimensions of a 1" top tube, and 1.125" down and seat tubes. "Partial oversized" (what used to just be "oversized", and is now sometimes called "standard") oft refers to 1.125" top and seat tubes and a 1.25" down tube. Most "modern" race bikes have moved into "Over-oversized", which isn't at all standardized and just means big, often shaped, tubing. In tubing, thick walls means strong, and big diameter means stiff. As bikes have been built with bigger pipes, those pipes have usually become thinner to offset weight.

I've seen quite a few big-tubed bikes lately, and man, do I love em for their applications. I'm "only" 175lbs, and my track bike has a 52mm deep down tube! But what does it feel like to be, say, 75lbs bigger? And riding a "normal" bike?

Only one way to find out!

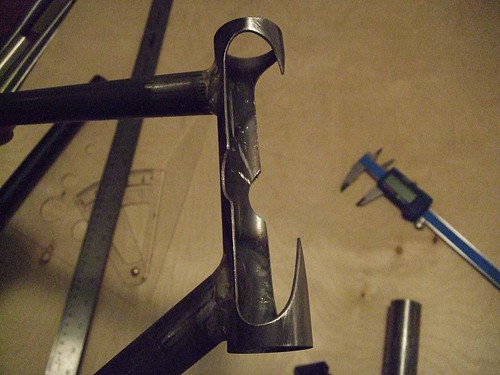
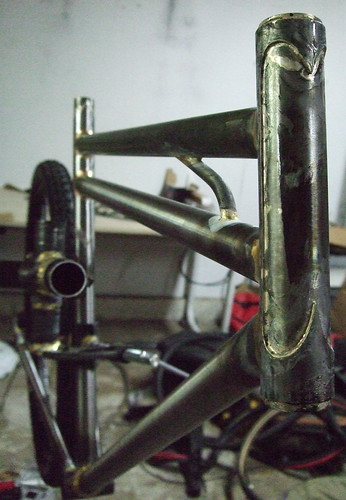
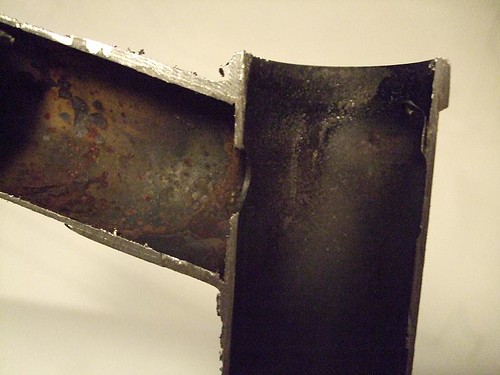
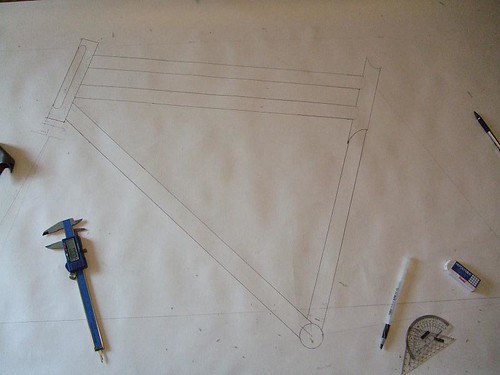
I decided to build myself a frame where every tube (save the head tube and BB shell, because I can't yet make bearings) in one size 
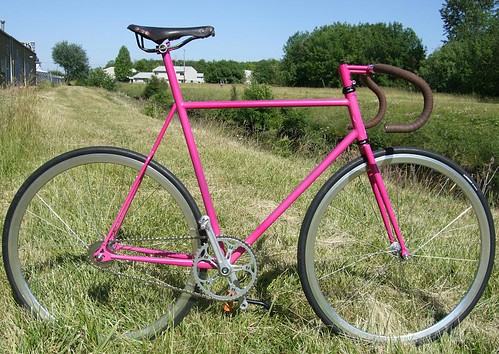
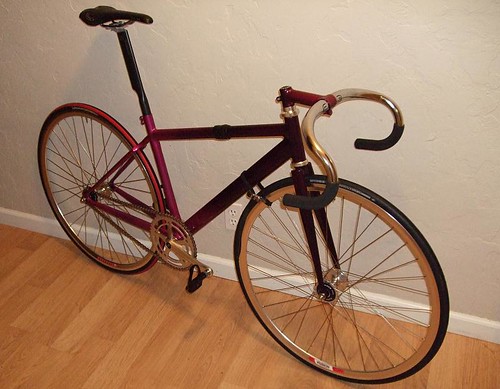
smaller then standard! 7/8" top tube, 1" seat and down tube. Instead of 14mm seat stays I've gone with 3/8" (9.5mm)! I even cut off the ends of some ROR chain stays to get smaller then normal oval stays! The bike has made its way through paint and is in the assembly stage now. I'll be updating both the blog and my Flickr account with some of then many pictures I've taken.

Whats it ride like? How does the handling change? Can it survive (a real question for big folks on bikes)? Will I?


Wish me luck!

Wednesday, June 4, 2008

As the tube turns...

Last blog entry I mentioned turning town some seat tube sleeves for the his and her bikes. Here is a great shot with the full thickness tube next to the slimmed down sleeve laminate. This will make brazing up a breeze with no weight penalty.


Unfortunately, the tubes I ordered for this bike went on a bit of an adventure. After leaving Dover and hopping on a plane in Heathrow they arrived safely in San Francisco. They then took a turn for Oakland rather then Eugene where they have had a great little vacation. I think I've gotten that straightened out, and hope to use them soon.


Can't wait, since this
monster needs a new home!


So as to not sit ideally in the meantime I have started another quick project. No details yet, but it will let me play with a few features I've been meaning to experiment with. Its rather impromptu and is a fun exercise. I'll post more details when I get further along, but here is a teaser shot from tonight!


*Tonights Quixotic entry has been made possible by the smooth sounds of Astrud Gilbert.

Sunday, June 1, 2008

Buy custom, save money!

I roughed out 2 of the laminates for the his and hers set and will be doing the clean up work today.


These start off as .058" walled 1.125" 4130. I hogged off a little more then .028" of wall thickness to do three things:
1. Make them blend a bit more visually
2. Thin them out to better match the wall thickness of the joining tubes for easier pre-heat and better brazing.
3. Drop some weight

I find number three the most amusing. I weighed both a non-machined mock up and the mid-stage version with the thin walls. For a 3.25" sleeve the weight dropped from 66g to 30g. In bike world, Shimagnolo charges $100 for that. That means I just saved enough weight to "settle" on a carbon Chorus rear derailleur! Of course, since this is for a bike with a Nexus 8 speed rear hub (which weighs about 1600g), I default to reasons 1 and 2 for this particular application.

In other news, if I built bikes in Springfield
I would look like this:

Tuesday, May 27, 2008

JRA Continued

To be brief- I was unkind and anything but gentle to that poor frame. Results indicate that tubular steel structures really are ridiculously strong.

Coup de grĂ¢ce-

A cross section of the upper head tube lug. Clean filler penetration from tip to lip here (the thin silver streak between the lug and the tube). Check out flikr for a nice internal fillet shot from the same joint.

In other news I just started work on a his and hers set of town bikes. His will be a twin top tube paper boy (ala Hawthorne) and hers a step through. Tubes are on their way as we speak, and I'll be finishing up bilam pieces in the meantime.