Saturday, July 5, 2008

Big News- Winter Bicycles!

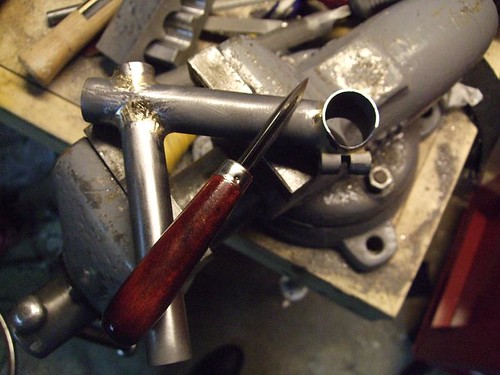
Please excuse the brief blog update lull. Its been a very busy last couple of weeks.In addition to work on the cruiser I have also been updating some of my tooling in preparation of a big leap.

After quite a bit of thinking, planning and work, I am quite happy to announce that I am closing the proverbial door on Quixotic Bicycles and opening a new, shiny and bigger door to Winter Bicycles! We are just getting rolling on the web site and will continue to keep adding updates to the Flickr gallery and the new blog.

With the new name I am also pleased to announce that Winter frames and parts will be available to the public. I hope to make complete build packages available in the coming weeks. Please contact me at info@winterbicycles.com to get started on your new project!

Thanks for the continued support, and I look forward to seeing you all at the new blog!

Eric Estlund- Winter Bicycles

Wednesday, June 18, 2008

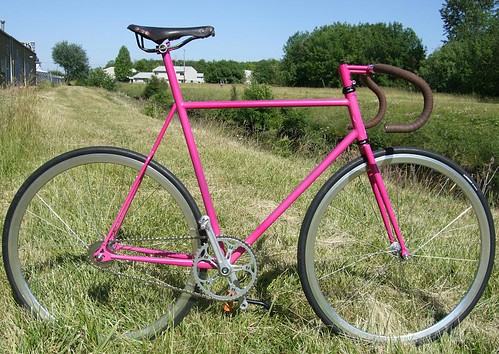
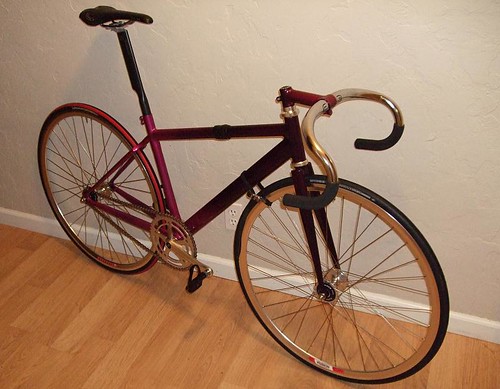
experiMENTAL Whip 2

Well, here it is!


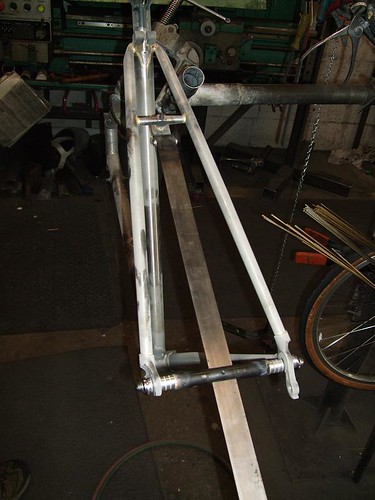
Fully undersized tubing (7/8" top tube, 1" seat and down tube, 3/8" seat stays and cut down chain stays).
Integrated seat mast.
All fillets brazed with nickel silver.
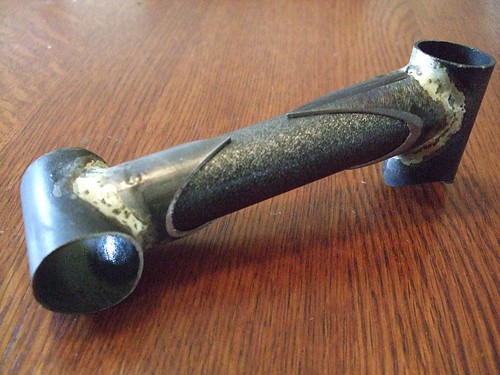
Tri-tube stem.
380mm stays, 75*seat, 74* head, 33mm rake
Electric Mayhem Pink (named after the most influential band of the 20th century)

Laser sharp geometry and flexy tubing seems to be a really fun combo so far.


Now I just need to dig out my old studded belt...

Tuesday, June 17, 2008

The last weeks happenings.

Interesting last week and a half.

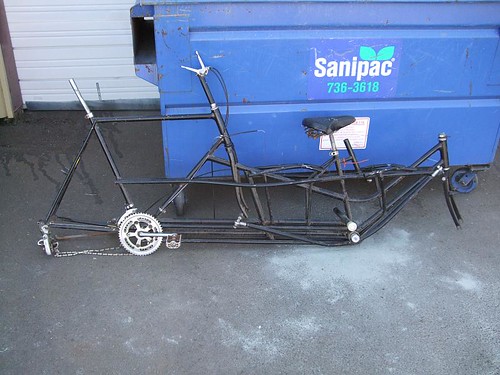
Out of nowhere this showed up at the dumpster.
I counted at least 3 donor bikes, possibly 4. It is clearly an attempt at a rear steer tandem, but the steering linkage gets tangled in the frame and only allows it to turn right. So clearly not a track bike... A co-worker tried to stuff it in the car she saw drop it off, but it was to heavy to drag across the parking lot.

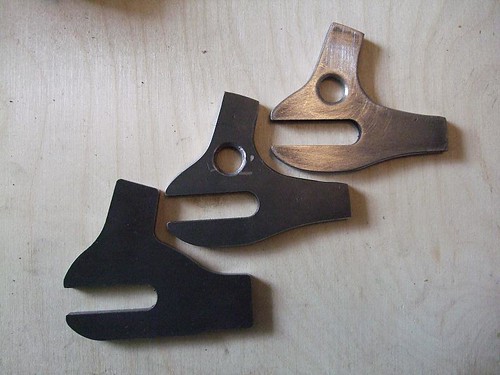
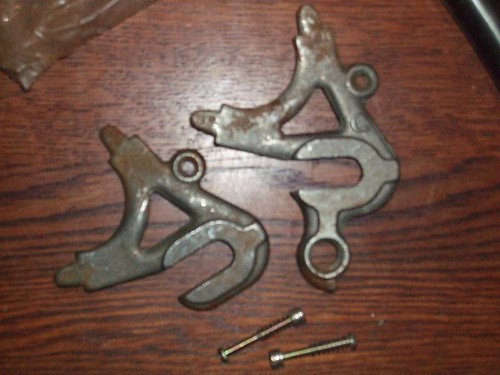
I have wanted to build with the Campy track ends for a long time now (6 years?), so I ordered up a couple sets. Wowzers- these looked better in my imagination. I've been spoiled with KP and Paragon ends I guess. Lots of carving on a belt grinder later I finally got to a workable place.

Just to illustrate how continuously cool the custom bike world is, this week is only two days old and I've had the pleasure to work on a bike for someone 5'0", a rider that is 6'8", and a tandem team that is a powerful 520lbs combined. I LOVE it!

The spring has been fantastic, but its good to get out of the valley from time to time. My wife and I packed up the pooch and headed for the coast over the weekend. Sometimes, it is good to feel humble.


I pretty well wrapped up the experiMENTAL Whip, and will have complete images and a ride report just after I get a headset in it. I've also mitered the His tubes in the His and Hers set, stay tuned for more build details. In the meantime, I'm off for another nap!


Tuesday, June 10, 2008

experiMENTAL Whip 1

I've had a few ideas I've been meaning to try, and the delay in the cruiser tubes was the perfect opportunity to work on a play bike. Something to experiment on. Or, as the case may be, go totally experiMENTAL!

Driving premise- what does it feel like to be a Clydesdale (a race class where you must be over 6' or 200lbs)riding a standard tubed bike?

"Standard" is the typical steel road bike dimensions of a 1" top tube, and 1.125" down and seat tubes. "Partial oversized" (what used to just be "oversized", and is now sometimes called "standard") oft refers to 1.125" top and seat tubes and a 1.25" down tube. Most "modern" race bikes have moved into "Over-oversized", which isn't at all standardized and just means big, often shaped, tubing. In tubing, thick walls means strong, and big diameter means stiff. As bikes have been built with bigger pipes, those pipes have usually become thinner to offset weight.

I've seen quite a few big-tubed bikes lately, and man, do I love em for their applications. I'm "only" 175lbs, and my track bike has a 52mm deep down tube! But what does it feel like to be, say, 75lbs bigger? And riding a "normal" bike?

Only one way to find out!

I decided to build myself a frame where every tube (save the head tube and BB shell, because I can't yet make bearings) in one size smaller then standard! 7/8" top tube, 1" seat and down tube. Instead of 14mm seat stays I've gone with 3/8" (9.5mm)! I even cut off the ends of some ROR chain stays to get smaller then normal oval stays! The bike has made its way through paint and is in the assembly stage now. I'll be updating both the blog and my Flickr account with some of then many pictures I've taken.

Whats it ride like? How does the handling change? Can it survive (a real question for big folks on bikes)? Will I?


Wish me luck!
Wednesday, June 4, 2008

As the tube turns...

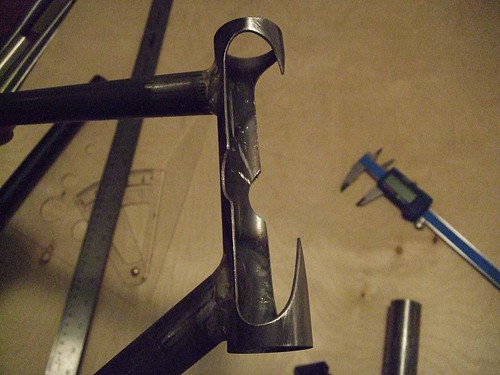
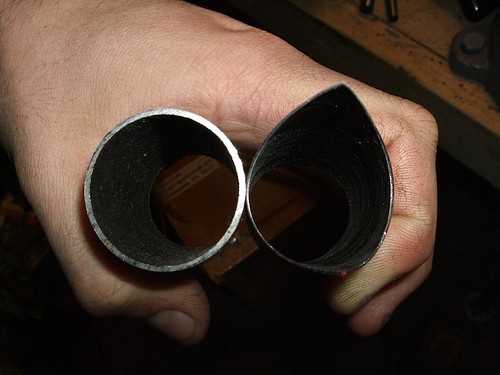
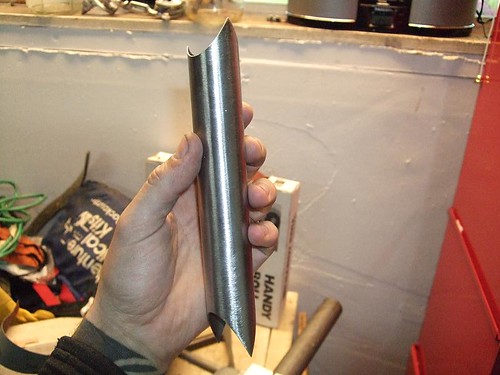
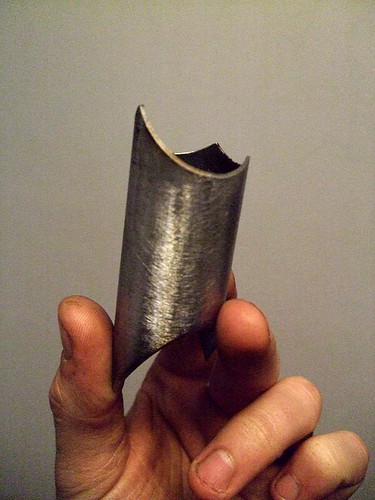
Last blog entry I mentioned turning town some seat tube sleeves for the his and her bikes. Here is a great shot with the full thickness tube next to the slimmed down sleeve laminate. This will make brazing up a breeze with no weight penalty.


Unfortunately, the tubes I ordered for this bike went on a bit of an adventure. After leaving Dover and hopping on a plane in Heathrow they arrived safely in San Francisco. They then took a turn for Oakland rather then Eugene where they have had a great little vacation. I think I've gotten that straightened out, and hope to use them soon.


Can't wait, since this
monster needs a new home!


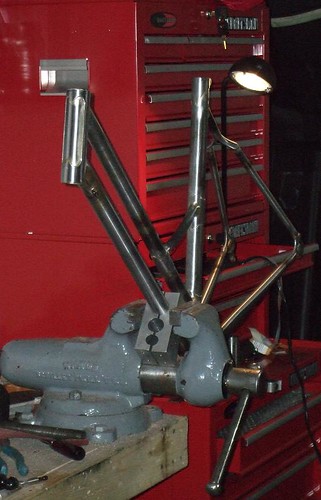
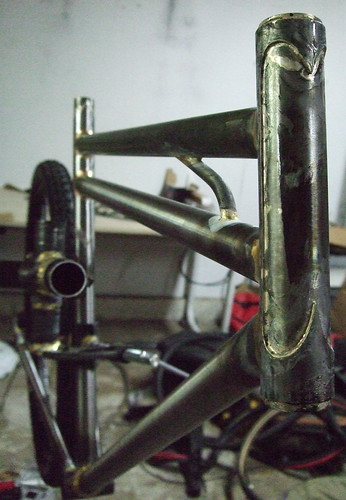
So as to not sit ideally in the meantime I have started another quick project. No details yet, but it will let me play with a few features I've been meaning to experiment with. Its rather impromptu and is a fun exercise. I'll post more details when I get further along, but here is a teaser shot from tonight!


*Tonights Quixotic entry has been made possible by the smooth sounds of Astrud Gilbert.

Sunday, June 1, 2008

Buy custom, save money!

I roughed out 2 of the laminates for the his and hers set and will be doing the clean up work today.


These start off as .058" walled 1.125" 4130. I hogged off a little more then .028" of wall thickness to do three things:
1. Make them blend a bit more visually
2. Thin them out to better match the wall thickness of the joining tubes for easier pre-heat and better brazing.
3. Drop some weight

I find number three the most amusing. I weighed both a non-machined mock up and the mid-stage version with the thin walls. For a 3.25" sleeve the weight dropped from 66g to 30g. In bike world, Shimagnolo charges $100 for that. That means I just saved enough weight to "settle" on a carbon Chorus rear derailleur! Of course, since this is for a bike with a Nexus 8 speed rear hub (which weighs about 1600g), I default to reasons 1 and 2 for this particular application.

In other news, if I built bikes in Springfield
I would look like this:

Tuesday, May 27, 2008

JRA Continued

To be brief- I was unkind and anything but gentle to that poor frame. Results indicate that tubular steel structures really are ridiculously strong.

Coup de grĂ¢ce-

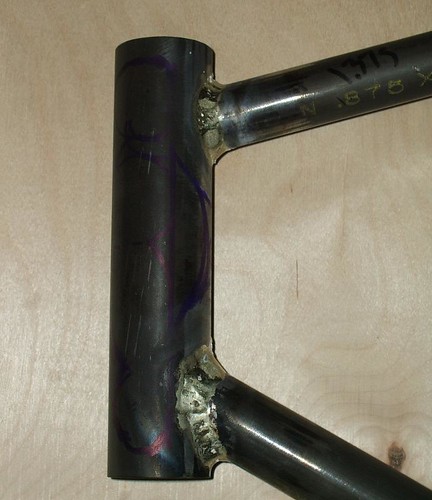
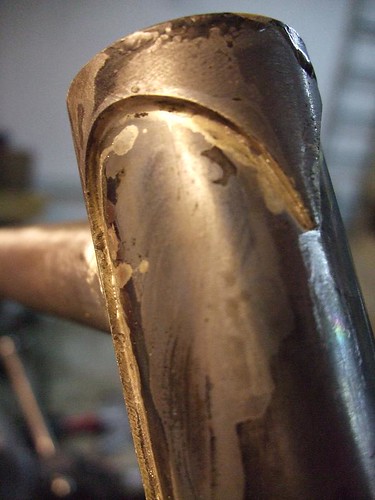
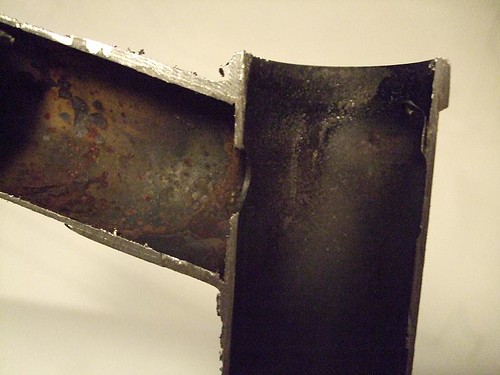
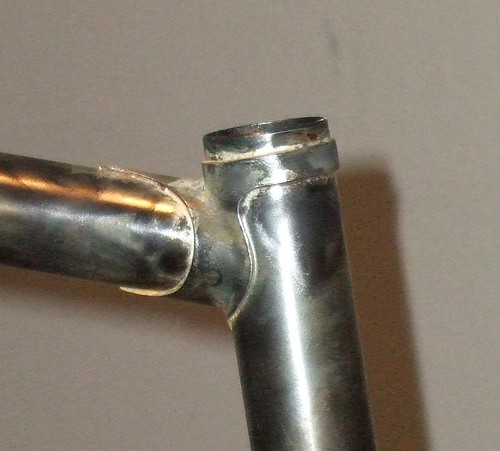
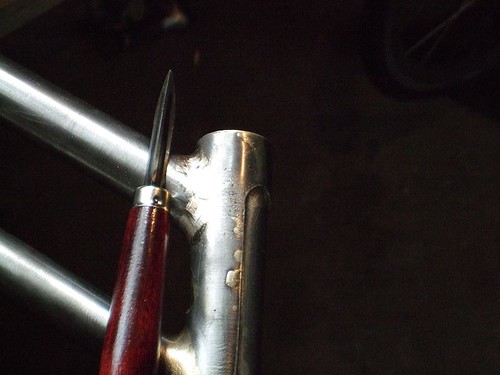
A cross section of the upper head tube lug. Clean filler penetration from tip to lip here (the thin silver streak between the lug and the tube). Check out flikr for a nice internal fillet shot from the same joint.

In other news I just started work on a his and hers set of town bikes. His will be a twin top tube paper boy (ala Hawthorne) and hers a step through. Tubes are on their way as we speak, and I'll be finishing up bilam pieces in the meantime.

Saturday, May 17, 2008

Bring the heat!

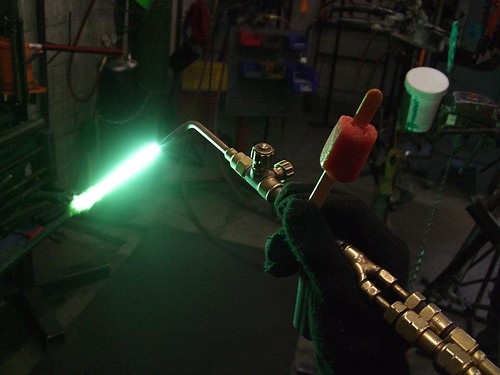
Yesterday it was 90 degrees out and a little bit hotter in the shop. I stand between a 400 degree powder coating oven and a 6000 degree torch. Whats a boy to do to beat the heat?

MMmmmmmmm.....


...tasty fruity deliciousness.

In other news, I decided to do a little "JRA" bench testing. For long time bike shop folks "JRA" means "just riding along", and is usually applied to bikes that have been the worst kind of mangled and then returned for "warranty" work. IE-"I don't know how it cracked in half, I was just riding along!"

In this case "JRA" means "Jury Rigged and Anecdotal". Just like my stem testing this is non-scientific "beat on it and see what happens" testing.


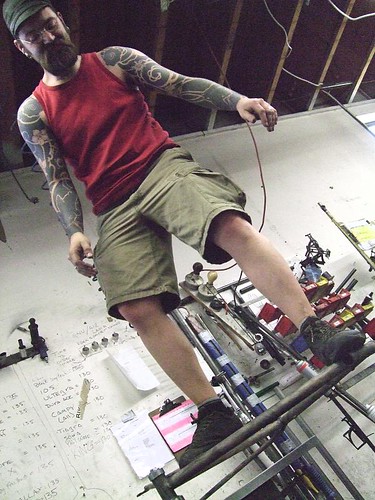
Here your 175lb frame builder is bouncing on the head tube with nothing but the bottom bracket supporting the frame. That look on my face is me realizing that the cement floor could get closer at any second. Fortunately, steel frames are rather (reassuringly) over built in the strength department, and my "testing" didn't even change the front end alignment. Not to shabby.

And, just in case you were worried, rest assured this frame will not be sent out! It will undergo a few more "impactful"* stress tests before getting cut up and recycled.


Big things are in the works here at QB. Summer is here, and things are rolling! A few more bikes were just added to the hopper- stay tuned for more updates!


*Tee hee!- I like the double entendre and say "so there grammar police"!

Monday, May 12, 2008

10 days later...

Sweet bejeezus- its been 10 days since my last post. A big thank you to the faithful that have checked in sans updates this last week, I appreciate it.

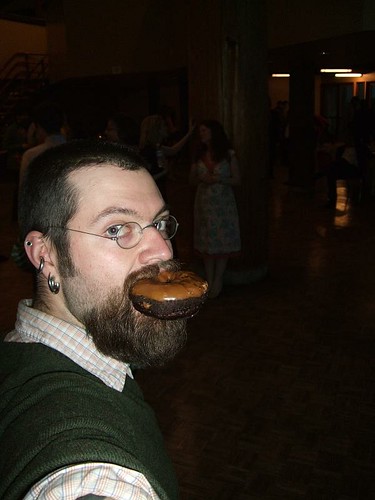
After the weekend of birthdays that called me away I just wrapped up a visit with some friends in Seattle to celebrate a wedding. It was a great visit! (Thanks Amanda, Brian, Hayden and Richard!) Yes- that is wedding cake in my mouth.

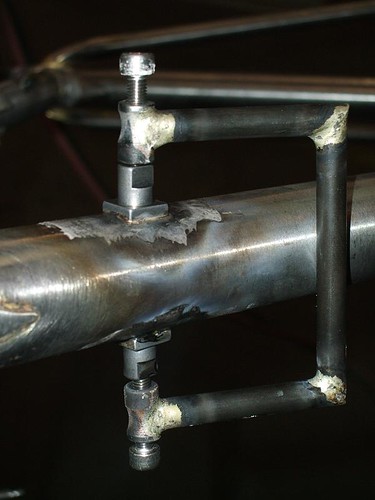
Just before taking off I snapped a couple of shots of another home brew tool- this time a jig for holding brake bridges and such.


As much fun as it was to hang out with friends, I did get a mighty hankering to get back into the shop. I picked up work on a stem from last Friday- I hope to get it in a paint batch with a frame set this week. Below is a raw brazing shot and another showing some progress. More on flikr.

Friday, May 2, 2008

Phew!

Wow.

At the day job we did 45 bikes this week including about 6 or 7 tandems. That is 9 a day, M-F. My eyeballs are about to fall out, but it was pretty awesome to be able to do!

This week started off with a multi-party for my wife and several of our friends celebrating there birthdays. Tomorrow is the actual date, so I'll be pretty bike-light this weekend (other then riding em, talking about em, and maybe working on them some).

Monday I mentioned building a few tools of convenience. Here is a little adjustable jig I made to hold down tube shift bosses in phase with each other. I have had great luck doing these with the calip-eyes and fingcrometers, but this little widget is a great time saver!

Monday, April 28, 2008

Monday Update

The lugged frame was on a bit of a hold while I waited for some shift lever bosses. Those just arrived today, and will be on the bike asap. In the meantime, I took some time to build a few tools and to do some destructive testing on a stem.

The tools will make their blog appearances as they are used, but consist of a shift boss jig and a canti boss/ rack mount/ bridge adjustable jig. I've had great luck just eyeballing and measuring these, but the tools should make set up a little quicker.

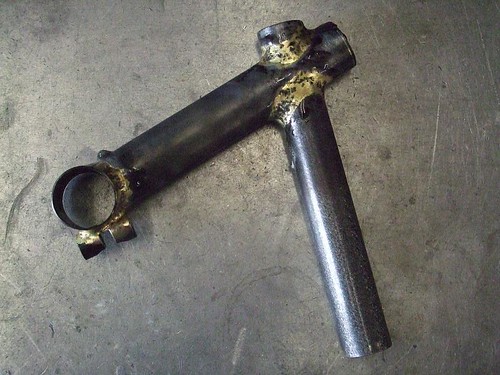
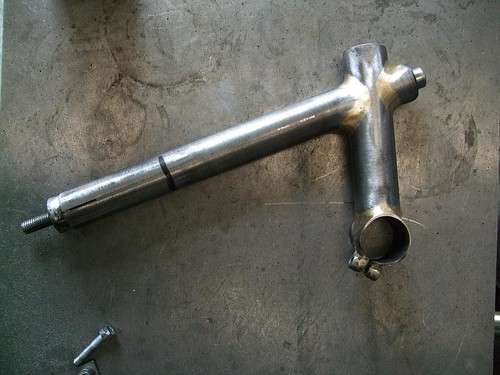
The stem was made with 4130 .035 tubing and was nickel silver brazed with only gasflux. I intentionally put this together sloppily to see what kind of results I could get. I started off putting it in my vise with a cheater bar on the quill. I could not get it to bend enough to take a set. After exhausting myself there, I proceeded to beat on it for a half hour with a 2 lb sledge hammer. While its nice and mangled, nothing "broke". After enough whacks, the tubes started to collapse in, but all of the brazing held.

This is GREAT!!! If you take a crash, you want the stem to spin on the steerer or at worst bend, but not snap off at the joint. While it might be a bit crooked, you can ride it home. I was very pleased with these bench test results.

Pleased with the success of this crude test I also started making a lugged stem. This is not a kit stem, but rather a quill with Quixotic made lugs in the constructeur style. Stay tuned to watch this develop!

Thursday, April 17, 2008

Depth

I have been going nut job bonkers lately with all my crappy frame pictures. The depth of field has been all off, and I have great pictures of crisp door jams with blurry frame details obstructing the view.

I'm a bit of a luddite, and have only relatively recently moved from a camera that works fine without a battery to a digital P&S (or POS depending on my frustration level).

Today, in a frantic button pushing session trying to change my ISO I discovered that my camera has a MACRO setting. Holy moly- I really should pay more attention to the owners manual (which I read).

To celebrate, here is my first successful macro shot showing the beginning stages of lug thinning.


*Etymology Trivia Points- Holy moly (first used by Capt. Marvel in 1943 as "holy moley") is a rhyming derivative of "holy mackerel", which was first used around 1803. True Luddites (1811) would have preferred the fish reference.

Tuesday, April 15, 2008

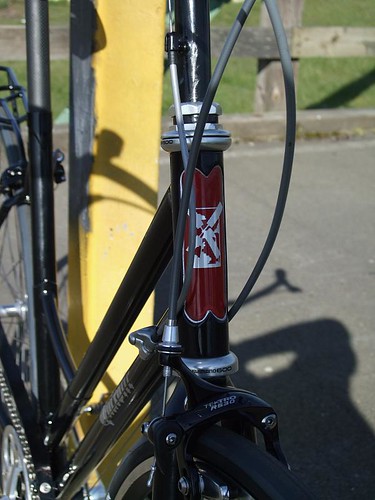
Head badges!

I have two working models of the new head badge. They are essentially the same graphic, but the background uses negative space a bit differently.

One is a bit more filled in with a positive sky and negative clouds:


The other has a negative sky with positive clouds:


I think I like the the second one a bit more. Thoughts?

Shiggy at mtbtires.com was kind enough to cut them for me out of some brushed aluminum vinyl I found. The vinyl has been a great way to do some quick and inexpensive prototyping before doing this in stainless (and maybe some in copper).

Unfortunately my camera battery died just as I was setting up to work on the current lugged road frame so I don't have very many process pictures. I did get the battery charged though, and will be picking up again now that most of the frame brazing is done. I'll leave you with a 10pm head lug picture though. The whole joints worth of silver was pulled in from the tip of the top tube point.

Sunday, April 6, 2008

Working Dog?

Nope- not a euphemism for my approach to bike building.

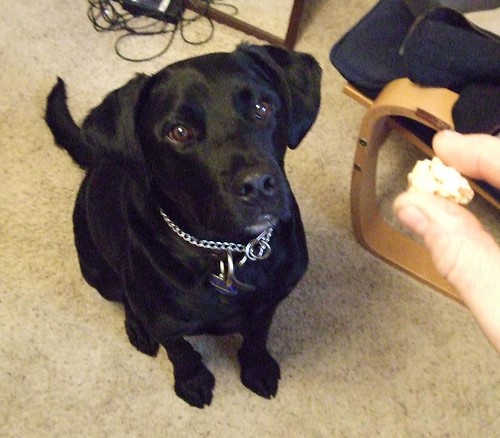
I'm talking about Charley, my 80lb lap/shop dog.

My friend Andrew has a great blogwith a focus on his vizsla's training progress as bird dogs. Vizsla's are a very pretty red hunting dog of medium build that seem to turn out as very eager working dogs.

Charley is a classic American pound pup- we picked him up as a small black rottweiler that quickly blossomed into a large black lab. I blame the unconquerable viral genes of the labrador. They could mate with chairs and produce black lab puppies.

Charley just had his third birthday, and after quite a bit of work, here he is executing a very distinguished point.

Currently he and my wife are working on his retrieve by rolling a squeaky ball back and forth on the couch. This afternoon he will be marking cats out of the living room window. We've put quite a bit of work in on this, and he can now do it flawlessly with zero hesitation.

On the bike front I am finishing up tube selection for fully lugged road bike. Stay tuned for developments.

Friday, April 4, 2008

When little tubes grow up...

... They become racks.


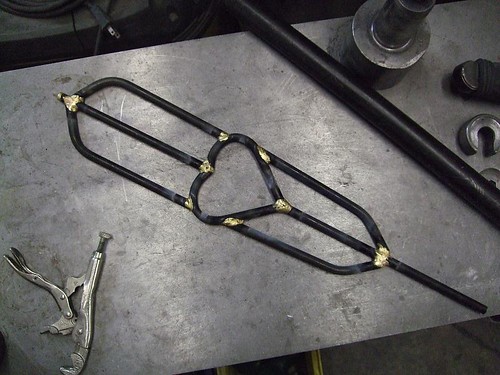
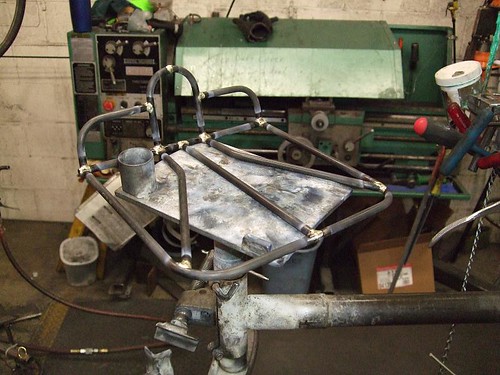
I've been working on a few rack projects from cast off 4130 tubing. We use a lot of this at work for supports and stock racks. I try to pick up bits that are over a couple inches long but to short for shop use. Every so often I end up with enough to crank out a rack platform. The image above is the feather shaped platform that became the rack on the (just completed) step through.


Take a look at the chain guard and new decals/ head tube badge prototypes.


This week was a long one at 46 bikes (hence the late blog update). At the end of the day, one must ask oneself "What is the best way to relax after another long day?".

By combining re-used materials with a love of bicycling, fire, art deco design and 80's Atari iconodulism to make a pretty neat-o small porteur-esque front rack.

This will be for my randonee bike, and I'm debating adding an integrated decaleur (bag mount). Since I don't have a bag yet, I may hold off and just make the support modeler in case I add one down the road.

Thursday, March 27, 2008

Why build custom?

This has been a pretty great week. Ok, so at 7 this morning I ate it hard on some ice (and spend most of the day eating vitamin I and sleeping), but other then that, pretty darn sweet.

For most of us custom built bikes are a decadent luxury. Sure, I am pretty darn flexible and have really long monkey arms and short femurs, but deep down I know I'd be ok fit wise with a 53 to 55 cm road bike from any of the major companies. While I have built bikes with a much more precise fit (in some cases event specific fit), it's really not necessary so much as fun, challenging and technically interesting. And thats the case for 98% of the bicycle riding public. Does it mean they don't want, deserve or purchase custom? Hell no- custom is fun, and a chance to get what you want how you want it.

But every now and again, you find a customer that really, truly, needs a custom fit.

This week I have had the pleasure (at my day job) of building bikes for a 4ft tall 100 pound rider, and a 6'2" 350lb rider.

I don't know of a quality stock bike on the market that would really fit and preform well for either of these customers, and I am proud to help make options available to folks well outside the boundaries of a saddle and stem swap. Outside of cool lugs and fancy paint, this is what custom means to me.

Oh, and I finished the torch (and most of the clean up) work on the step through.

Tuesday, March 25, 2008

Fittings and such

Hi folks! I took the weekend off, but am back to work on the step through. This bike will be getting a few one off fittings (accessories) that I will try to photo document and post pictures of. I realized that a few of the special features planned for this one would loose the surprise for the rider if I posted them here first, so I'll be saving a few for later release.

In the meantime, I have started a flickr collection called "Fittings" to show some of my accouterments such as stems, racks, chain guards, etc. I did a quick 6 step progress series for a Cinelli style quill stem slated for this bike. I've made a few of these, but this was the first where the quill pierced the extension. Made the job a fair bit easier, and it looks really good. I think I'll stick with it for now.

Tuesday, March 18, 2008

Too much coffee...

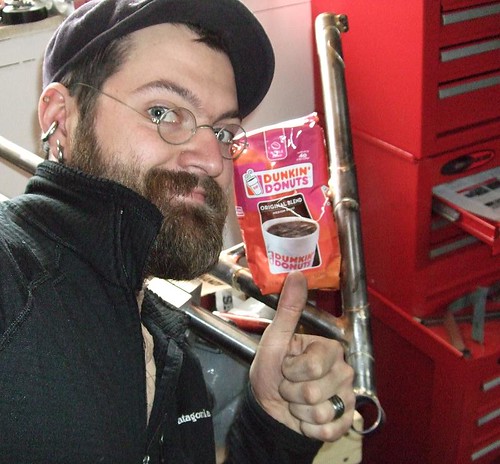
While following random links in Flickr, I ran across an interesting picture taken during an Independent Fabrications factory tour. On the Bicycle Escape shop Blog they talk about a trash can at IF filled with Dunkin Donuts cups and mention "IF runs on Dunkins" (a twist on the company slogan "America runs on Dunkin". Wow, that started the nostalgia/ serendipity bandwagon!

Just that day my parents contacted me and mentioned they wanted bikes. I haven't seen them ride for about 20 years, so I was rather excited by all of this! Now, the one unspoken constant in the Estlund household is the constant flow of coffee, and generally at my folks place that is DD's. As a youngster I used to drink ungodly amounts of the stuff (a gallon a day would be conservative). And while my tastes have developed (more espresso based) and quantity diminished (I limit myself to about 8-12 shots a day), the link is still strong. The orange and pink bubble letters still bring back a flood of visceral memories (ice fishing, cold morning walks, late night runs in HS, my dad's uncanny Dunkin Radar that could track down the tasty brew in any northern state).

Not but a few hours after speaking with my parents my wife shows up with a bag of Dunkin Donuts coffee beans (from Target no less). She saw them on the shelf and they reminded her of my folks.

Dunkin Donuts was founded in 1950 in Quincy, MA (just south of Boston). IF is located in Somerville (just north of Boston), which is the same town my grandparents are from. Hell, if its good enough for them, its good enough for me. Now then, lets see what this does pushed through an espresso machine!


Ya ma! Thinkn' of you!

To continue the semi random chain of incidents, I figured out how to effectively use a tri-scraper to finish fillets. This is based on a suggestion from Ted Wojcik, long time NH frame builder. Thanks Ted!

Thursday, March 13, 2008

The wait is over!

The last time I posted I mentioned searching for drop outs. Low and behold my boss at BF had this set he has been storing for about 20 years in a drawer that he was willing to donate. They are a bit rough in the casting, but the vintage makes them a great match for the frame, and I'm sure they will clean up great!

I have added a bunch of pictures to the flickr set for this build. I forgot my camera when I was mitering tubes, so we skip right from the raw tubing image to the bike in the jig for tacking.

After finishing the very compact sprint bike and very small 650b, this mixte frame adds a whole new level of "tight"! Those tubes are about 4" apart running parallel from the head tube to the seat tube. I'll add another micro TT from the actual top tube to the second bilaminate section to give the seat tube a little more support.

I have the front end fillets finished, but the light was no good for photos. I'll add the chain stays, braze in the head tube proper and sweat the laminate pieces and post some more pictures.

Wednesday, March 5, 2008

What to do while waiting...

In the last update I mentioned the load of tubes that arrived in the mail. Unfortunately my main three suppliers are out of the drop outs I need and my back up is in Taipei.

Not to be dismayed I continue to keep myself busy and move along with what I can do at the moment. In addition to lacing up some wheels, I busied myself with prep work for the next build.

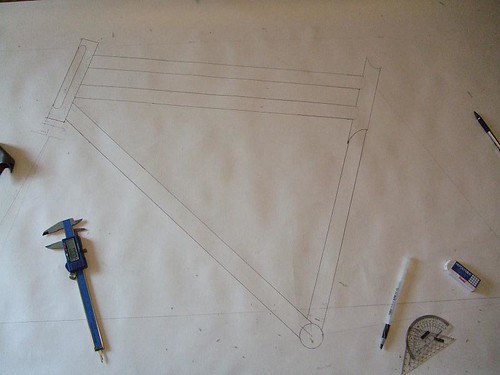
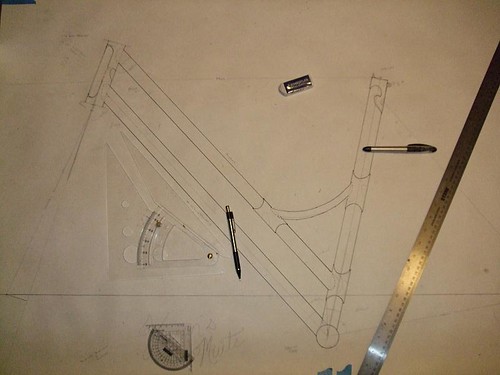
I do most of my design work in my noggin, then finish up and pull miter angles and lengths off of a full sized drawing. This also gives me a visual to double check things like pedal to fender clearance, etc. Here is a pick of the current build's drawing.


This is for a 700c rambler. The terms city bike and hybrid have started to pigeon hole a bit (hybrid maybe more then a little bit). I'm calling my mulit-use bikes "ramblers", custom designed for your application (not just a mix of road and mountain like aspects). In this case I am matching the handling geometry of a race frame with the position and fit of a 74' Schwinn Suburban. This will be for a rider re-couping from a wrist injury that just couldn't get into pushing around 40+ lbs of American pig-iron, but loved her mixte fit.

This frame will use a Dedacciai Uno tube set and be a fillet/ bi-laminate constructed bicycle. Essentially, bi-laminate means that steel sleeves will be brazed on the outside of the thin walled tubes to act as an external butte to support the loads of intersecting tubes. Sort of like open faced lugs. In the drawing, these can be seen at the head tube, top tube, and 3 on the seat tube. Any place a butted end will be brazed to a thin section, there will be a laminated sleeve to help distribute the load.

Most bicycle tubing is measured in mm. The seat tube in this case is 28.6mm in diameter, but only .6mm thick in the thin part of the wall. 28.6mm is about 1 1/8". 1 1/4" 4130 with a wall thickness of .058" slip fits over a 28.6mm tube with just enough room to sweat in some silver. But who wants to put a hog .058" (1.47mm) sleeve onto a .6mm tube?

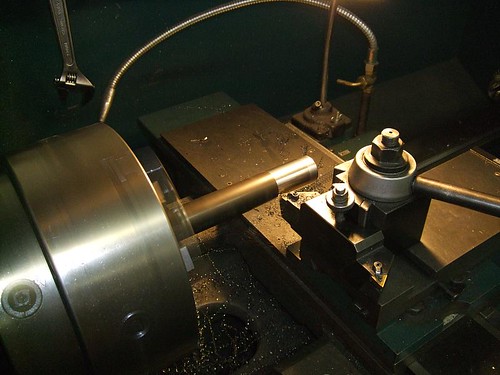
To balance out the wall thicknesses I turned down the 4130 stock on the lathe to about .7mm. Sticking this on will more then double the tubes wall thickness with a negligible weight penalty, will help mitigate heat distortion from brazing, and will look totally bad ass with some subtlety carved embellishment.

I'll try to do a better job of taking in-progress pics and blogging about this build. Stay tuned for the next installment!